There are few wardrobe malfunctions as universally frustrating as a separating zipper. One moment you're bundling up your favorite jacket, the next, the zipper's split wide open, often with the slider completely detached from its track. It feels like a moment of defeat, signaling either a trip to the tailor or, worse, the trash bin for a perfectly good garment. But what if I told you that fixing this common problem, especially with a separating zipper, is often a straightforward DIY task? With this step-by-step guide to reattaching a separating zipper, you'll learn exactly how to get your gear back in working order.
You don't need to be a sewing expert or a seasoned tailor to tackle this. All it takes is a little patience, the right tools, and a clear understanding of the process. This isn't just about saving a jacket; it's about reclaiming your autonomy over everyday repairs and extending the life of your beloved items. Let's zip through it!
At a Glance: Your Zipper Repair Cheat Sheet
- Diagnosis is Key: First, identify your zipper type (separating or closed-end) and the specific damage before starting.
- Small Tools, Big Impact: Needle-nose pliers are your best friend for delicate metal work.
- Mind the Stops: The top stops are crucial for keeping your slider on track. You'll likely remove and reattach one.
- Teeth Alignment: Ensure all zipper teeth are perfectly aligned before attempting to reinsert the slider.
- Gentle Does It: Never force the slider. Wiggle and coax it, but avoid brute force to prevent further damage.
- Lubrication is Gold: A little wax or graphite can make a world of difference for smooth operation.
- Know When to Replace: Sometimes, a worn-out slider or missing teeth mean it's time for a replacement part, not just a reattachment.
Why Your Zipper Called It Quits: Common Culprits Behind the Separation
Before diving into the fix, it helps to understand why your zipper might have decided to part ways in the first place. Knowing the cause can help prevent future issues and inform your repair strategy.
Often, the problem isn't a single catastrophic event but a gradual weakening or an accidental slip. Here are the usual suspects:
- The Escapist Slider: The most common culprit is a slider that's simply come off its tracks. This usually happens when a top stopper is broken, loose, or even completely missing, leaving an open gate for the slider to exit.
- Misaligned or Missing Teeth: If the zipper teeth themselves are bent, damaged, or entirely gone from a section of the tape, they can't mesh properly, leading to separation even if the slider is still attached. This is particularly common in older zippers or those under frequent stress.
- Broken Top or Bottom Stops: These small metal or plastic pieces at the ends of the zipper track are essential. A damaged top stop allows the slider to escape upwards, while a compromised bottom box (on separating zippers) prevents the two sides from properly joining at the start.
- Fabric Fails: Sometimes, it's not the zipper itself but the surrounding fabric. Excessive tension from pulling too hard, zipping too fast, or even just snagging loose threads can cause stress points that lead to separation or slider detachment.
- Wear and Tear on the Slider: Over time, the internal mechanism of the slider can loosen or bend, losing its grip on the zipper teeth. It might look fine on the outside, but it's no longer performing its primary function of interlocking the teeth securely. This is often an invisible culprit that only reveals itself when the zipper consistently separates even after reattachment.
Identifying the specific issue will guide you in choosing the right approach and preparing the necessary tools for a successful repair.
Your Zipper Repair Kit: Essential Tools for the Job
Good news: you probably have most of what you need already. Zipper repair doesn't require a specialty toolkit, just a few common household items. Think of these as your basic surgical instruments for a delicate operation.
Here’s your essential toolkit:
- Needle-Nose Pliers: These are absolutely indispensable. Their fine tips allow you to gently pry open and crimp small metal pieces like zipper stops. Small-tipped pliers or even some wire cutters with a pointed end can also work in a pinch.
- Scissors: Useful for trimming any frayed threads or fabric that might be snagging the zipper, or for cutting a new piece of thread for a DIY stopper.
- Replacement Slider or Zipper Stop (if needed): If your slider is bent beyond repair or a stopper is completely missing, you'll need new parts. Keep an eye out for the size number on the back of your existing slider for a perfect match.
- Small Flathead Screwdriver (optional but handy): Can be useful for gently prying open tight metal stops or for fine adjustments.
- Thread and Needle (optional): For sewing on a new fabric stopper if you lose the metal one, or for reinforcing an existing stop.
- Lubricant: A little friction reduction goes a long way. Zipper wax (specifically designed for zippers), a graphite pencil (run the tip along the teeth), or even a candle wax can make a stiff zipper glide smoothly.
Having these items on hand will ensure you're ready for any scenario that might arise during the repair process.
Understanding Your Zipper: Separating vs. Closed-End
Before you start poking and prying, it's vital to know which type of zipper you're dealing with. This knowledge dictates your approach to reattaching the slider.
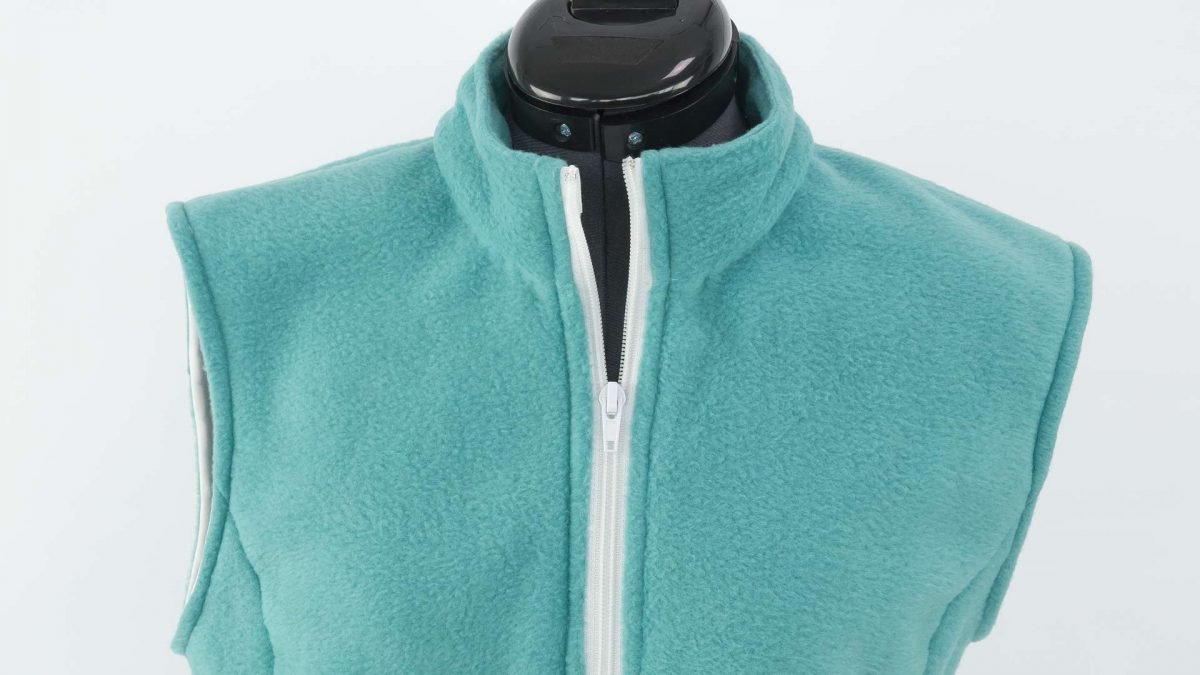
- Separating Zippers: These are the zippers that fully detach at the bottom. Think of the front of a jacket, a hoodie, or some sleeping bags. The key characteristic is the "pin and box" mechanism at the bottom, where a pin on one side slides into a box on the other, allowing the two halves to come apart entirely. When reattaching a slider to a separating zipper, you'll often work by reinserting both sides of the bottom of the zipper into the slider first. This article focuses primarily on these types, as they're the most common culprits for sliders coming completely off.
- Closed-End Zippers: These zippers have a permanent stop at the bottom, meaning the two sides never fully separate. You'll find them on jeans, most trousers, skirts, bags, and pillowcases. If the slider comes off a closed-end zipper, you must work from the top end, as there's no open bottom for reinsertion. The steps for these are very similar, but the starting point for slider reattachment differs.
For our purpose today – reattaching a separating zipper – we'll focus on the flexibility that the open bottom provides. However, many of the techniques, especially around handling stops and teeth, apply to both.
The Master Plan: Reattaching Your Zipper Slider, Step-by-Step
Alright, it’s time to get hands-on. This is where we transform that frustrating broken zipper into a fully functional one. Take your time, follow each step carefully, and remember that patience is your most valuable tool.
Step 1: Diagnose the Dilemma & Zipper Type
Your first order of business is a thorough examination. Lay your garment flat and take a good look at the zipper.
- Confirm Zipper Type: Is it a separating zipper (like on a jacket) or a closed-end zipper (like on jeans)? Since this guide focuses on separating zippers, we'll assume you have the former.
- Locate the Slider: Is it completely off the track? Is it stuck mid-way?
- Inspect the Teeth: Are any teeth bent, crushed, or missing? Are they aligned, or are they gapping?
- Check the Stops: Are the top stops (small metal or plastic clips at the very top) intact? What about the bottom box and pin? Often, a missing or loose top stop is the gateway for a slider's escape.
- Examine the Slider Itself: If you have the slider, is it bent, broken, or does it feel loose? Sometimes, the slider itself is the problem; if it's too wide, it won't grip the teeth properly. Check the back of the slider for a size number (e.g., #3, #5, #10) – this is crucial if you need a replacement.
A clear understanding of the damage will help you anticipate which sub-steps you might need to emphasize or if you need to acquire a replacement part.
Step 2: Liberate the Top Stop (Carefully!)
To reattach the slider, you typically need an open end of the zipper track. For separating zippers, while the bottom can be used, often the top is the easiest entry point for a rogue slider if the bottom is still intact. If the slider is completely off, removing a top stop provides a clear path.
- Locate the Top Stop: Find the small metal or plastic U-shaped piece crimped onto the top edge of the zipper tape, just above where the teeth end. There's one on each side.
- Gently Pry: Using your needle-nose pliers or a small flathead screwdriver, carefully pry open the stop. If it's metal, slowly work the pliers to un-crimp it. If it’s plastic, they can be more brittle and might break – be extra cautious or consider cutting the stitching around it if it's sewn on.
- Remove and Safeguard: Once loose, slide the stop off the zipper tape. Crucially, do not lose this tiny piece! Set it aside in a safe spot, as you'll need to reattach it later. If it's already missing or breaks, don't worry; you can either buy replacements or create a temporary fabric stop later.
Removing the stop creates the necessary opening to slide the zipper slider back onto the track.
Step 3: Aligning the A-Team: Taming Those Teeth
This step is critical for a smooth reattachment and a fully functional zipper. Misaligned teeth will cause immediate re-separation or prevent the slider from moving at all.
- Lay it Flat: Place the zipper flat on a hard, stable surface (a table or countertop is ideal). This gives you a firm base to work on.
- Push and Pop: Starting from the bottom of the zipper (where the pin and box are), carefully push the zipper teeth together. Work your way up, ensuring each tooth from one side alternates and "pops" perfectly into its counterpart on the other side.
- Straighten Any Rebels:
- Metal Teeth: If any metal teeth are bent, gently use your needle-nose pliers to straighten them. Apply light, even pressure to avoid breaking them off.
- Plastic/Nylon Teeth: These are more forgiving. Use your fingers to gently reshape any bent plastic teeth. Avoid using pliers on plastic teeth unless absolutely necessary, as they can easily crush them.
- Check for Gaps: Run your fingers over the aligned teeth. They should form a smooth, continuous line without any gaps or obvious misalignments. If they're not perfect, the slider won't work.
Think of this like perfectly aligning gears; if even one tooth is out of place, the whole mechanism will fail.
Step 4: The Comeback Kid: Reattaching the Slider
Now for the main event: getting that slider back on track. This can be the trickiest part, requiring a steady hand and a bit of finesse.
- Prepare the Zipper Tapes: Hold the two zipper tapes so they are perfectly even and aligned, extending just past the bottom of where the slider will sit. The teeth should be perfectly meshed for a few inches above the bottom pin/box, and the top opening from Step 2 should be clear.
- Orient the Slider: Pick up your slider. Notice that it has a wider, more open end and a narrower, closed end. The wider end is where the zipper teeth enter. You want to align this wider end with the bottom of your zipper where the pin and box are, or if using the top opening, align it with the open section created by removing the top stop.
- Insert the Teeth (Separating Zipper Method):
- For a separating zipper, ensure the bottom pin is inserted into the bottom box and held securely. The two zipper tapes should be perfectly aligned at the bottom.
- Carefully insert both sides of the zipper teeth into the wider openings of the slider simultaneously. This is often the most challenging part.
- It can help to insert one side of the teeth slightly first, then coax the other side in. You might need to gently wiggle the slider a bit to get both sides to catch evenly.
- Once both sides are started, the slider should sit firmly on the bottom pin/box area, ready to move up.
- Insert the Teeth (If Working from Top or Slider Completely Detached):
- If your slider came off entirely and you've removed a top stop, you can also reinsert the slider from the top.
- With the top stop removed, hold the two zipper tapes evenly. Insert one side of the zipper teeth into one opening of the slider.
- Then, carefully insert the other side of the zipper teeth into the second opening. Ensure they are both going in smoothly and evenly.
- Once both sides are engaged, gently pull the slider down a few inches.
- Gentle Pull: Once both sets of teeth are evenly inside the slider, gently pull the slider either upwards (if starting from the bottom) or downwards (if starting from the top). Do not force it. If it doesn't move easily, pull it back slightly and try reinserting or adjusting the teeth alignment again. Forcing it can bend the slider or damage the teeth.
Success here often feels like a small victory dance!
Step 5: Test Drive & Smooth Operator: Testing Movement & Lubrication
You've got the slider back on – excellent! But before you secure everything, you need to ensure it actually works.
- Initial Test: Gently zip the slider up and down the length of the zipper several times.
- Does it move smoothly?
- Do the teeth mesh perfectly every time?
- Does it separate at any point?
- If the teeth don't close, or if the zipper separates, the slider might be worn or bent internally.
- Quick Fix for Loose Sliders: You can very gently use your needle-nose pliers to slightly crimp the top and bottom of the slider (the narrow end that brings the teeth together) to reduce its internal gap. Be extremely careful, as too much pressure can crush the slider. Squeeze only a tiny bit at a time, test, and repeat if needed.
- Consider Replacement: If crimping doesn't work, or if the slider is visibly damaged, it's time to replace the slider itself.
- Lubricate for Long-Term Smoothness: Even if it's zipping fine, a little lubrication can significantly reduce friction and prolong the life of your zipper.
- Zipper Wax: The best option, specifically designed for this purpose.
- Graphite Pencil: Run the tip of a soft graphite pencil (like a #2 pencil) along both sides of the zipper teeth. The graphite acts as a dry lubricant.
- Candle Wax: A clear candle can also work. Rub it along the teeth, ensuring it gets into the grooves.
- Silicone Spray: A light, thin coat of silicone spray can also be effective, but be careful not to get it on the surrounding fabric if it could stain.
- Apply the lubricant generously to the teeth, then zip the slider up and down a few times to work it in. You'll often feel an immediate difference in smoothness.
This step ensures your repair isn't just cosmetic but truly functional.
Step 6: Secure the Gates: Reinstalling the Top Stop
With your zipper now fully operational, it’s time to close off the exit ramp for your slider.
- Position the Slider: Pull the slider down so it’s a few inches below the top of the zipper, out of the way.
- Retrieve Your Stop: Get that small metal or plastic U-shaped stop you carefully set aside in Step 2.
- Place and Crimp: Position the stop back onto the zipper tape exactly where it was previously located, just above the top-most tooth.
- Clamp Tight: Using your needle-nose pliers, firmly crimp the stop back onto the fabric and zipper tape. Ensure it’s tight and secure. Give it a gentle tug to confirm it won't easily slide off.
- DIY Stopper (If Original is Lost/Broken): If your original stop is lost, broken, or if you couldn't remove a plastic one without damaging it, you can create a quick and effective DIY stopper:
- Using a strong needle and thread (preferably heavy-duty polyester thread), sew several tight, dense stitches horizontally across the zipper tape, just above where the slider should stop.
- Make these stitches as compact and numerous as possible to create a thick barrier. Knot securely. This fabric barrier will prevent the slider from coming off the track.
This simple piece of hardware is crucial for preventing future slider escapes.
Step 7: The Grand Finale: Final Checks & Reinforcements
You're almost done! A few last checks will ensure your repair is robust and ready for action.
- Symmetry Check: Zip the zipper all the way up. Do both sides of the garment look even at the top? If one side is longer or shorter, it might indicate a slight misalignment when reattaching the slider or even a stretched zipper tape. For a guide to more advanced zipper fixes, including tape stretching and other issues, you might find a comprehensive guide to reattaching a zipper helpful.
- Snag Inspection: Run your fingers along the entire length of the zipper on both sides. Check for any loose threads from the garment or lining fabric that might have gotten caught in the teeth or are on the verge of doing so. Trim any culprits with your scissors.
- Reinforce (Optional for Heavy Use): For items that see heavy use (like winter coats or backpacks), consider adding a few reinforcing stitches to the base of the zipper box (for separating zippers) or to the reinstalled top stop. This extra bit of hand-sewing can significantly increase the longevity and strength of your repair. Use a strong thread and make small, tight stitches.
Congratulations! You've successfully performed zipper surgery. Now you can confidently wear your repaired item without fear of an unexpected wardrobe malfunction.
When to Call in a New Part (or the Whole Zipper)
While reattaching a slider or repairing a stop is often effective, there are times when the zipper's damage goes beyond a simple fix. Knowing when to replace parts (or the entire zipper) will save you time and frustration.
Consider replacing the slider or the entire zipper if:
- The Slider is Beyond Repair: If the slider is visibly bent, cracked, or has lost its internal grip even after gentle crimping attempts, it's not going to hold the teeth together reliably. A replacement slider (matched by size number) is your best bet. These are inexpensive and can be found at most fabric stores.
- Missing or Crushed Teeth: If a significant number of zipper teeth are missing or permanently crushed/bent (especially metal ones that snap), the zipper track itself is compromised. No slider, no matter how perfect, can bridge missing gaps. This usually necessitates a full zipper replacement.
- Consistent Separation: If you've reattached the slider multiple times, ensured teeth alignment, and even tried a new slider, but the zipper still separates consistently during use, the problem is likely with the zipper tape itself, or the fundamental design/wear of the teeth. At this point, replacing the entire zipper is often the most cost-effective and reliable solution.
- The Bottom Box is Destroyed: For separating zippers, if the bottom box (which receives the pin) is cracked, torn, or completely gone, the two sides won't connect securely. While sometimes repairable with specialized kits, often a full replacement is simpler.
Always try replacing just the slider first, as it's the easiest and cheapest component to swap. If that doesn't solve it, then a full zipper replacement is the next logical step.
Zipper Lifeline: Quick Fixes for On-the-Go Emergencies
Sometimes, you need a temporary solution right now, without the time or tools for a full repair. These emergency fixes can get you through a pinch until you can properly mend your zipper.
- The Trusty Paperclip or Keyring: If your slider's pull tab has broken off, leaving you nothing to grip, loop a paperclip or a small keyring through the hole in the slider. Voila! Instant temporary pull tab.
- Safety Pin as a Makeshift Stop: Did your top stop break, allowing the slider to fly off? Before you lose the slider entirely, slide a safety pin through the zipper tape just above the top-most tooth. Clamp it shut, and it will act as a temporary barrier, preventing the slider from overshooting the track.
- Rubber Band for Missing Pulls (Jeans/Boots): For pants or boots where the zipper won't stay up or has a missing pull, loop a strong rubber band through the slider's hole. Then, loop the rubber band around the button on your jeans or over the top hook of your boot. This adds tension and keeps the zipper securely in place.
- Pencil Graphite for Stiffness: A stiff zipper that's hard to move can often be temporarily remedied by rubbing a pencil tip along the teeth. The graphite acts as a dry lubricant, making it easier to zip.
While these won't fix the underlying problem, they're excellent hacks to keep in mind for those unexpected zipper crises.
Prolonging Zipper Life: Smart Maintenance Habits
An ounce of prevention is worth a pound of zipper repair. Adopting a few simple habits can significantly extend the life of your zippers and prevent them from separating in the first place.
- Keep Zippers Clean: Dirt, lint, and debris are the enemies of smooth zipper operation. Regularly clean your zippers with a small brush or even an old toothbrush. For garments that get very dirty (like outdoor gear), a gentle wash can remove grime from the teeth.
- Lubricate Occasionally: Just like any other moving part, zippers benefit from lubrication. Apply zipper wax, a graphite pencil, or a silicone-based lubricant a couple of times a year, or whenever you notice the zipper feeling stiff. This reduces friction and wear on both the teeth and the slider.
- Never Force a Snagged Zipper: This is perhaps the golden rule. If a zipper snags on fabric or thread, stop immediately. Forcing it will only jam it further, potentially bending teeth or damaging the slider. Gently wiggle the slider, pull the fabric taut, and slowly work the snag free.
- Inspect Regularly: Before a major outing or storing seasonal clothing, take a moment to inspect your zippers. Look for loose threads near the teeth, bent teeth, or damaged top/bottom stops. Catching these small issues early can prevent a full zipper failure.
- Zip Before Washing: Whenever possible, zip up zippers completely before throwing garments into the washing machine or dryer. This protects the zipper teeth and prevents the slider from snagging on other items in the load.
By incorporating these simple maintenance tips into your routine, you'll find yourself dealing with far fewer broken zippers and enjoying your garments for much longer.
FAQs: Your Zipper Repair Questions Answered
Even with a detailed guide, a few common questions always pop up. Here are quick answers to some frequent zipper repair queries:
Q: My zipper slider feels loose and won't grip the teeth. Can I fix it?
A: Yes, often. You can try to very gently crimp the top and bottom of the slider's opening with needle-nose pliers. Squeeze just a tiny bit, test the zipper, and repeat if needed. Be careful not to over-crimp, as this can make the slider too tight or even crush it. If this doesn't work, you likely need a new slider.
Q: How do I know what size zipper slider to buy?
A: Most sliders have a number stamped on their back (e.g., #3, #5, #10). This is your size. If there's no number, you can measure the width of the zipper teeth (when closed) and compare it to a zipper repair kit's sizing chart.
Q: What if my zipper teeth are plastic and bent? Can I straighten them?
A: Yes, plastic teeth are generally more flexible than metal. You can often gently straighten them with your fingers. Avoid using pliers unless absolutely necessary, as they can easily crush plastic teeth.
Q: My zipper keeps separating from the bottom after I fix it. What's wrong?
A: For separating zippers, this usually means the bottom box or pin is damaged, or the slider isn't seating properly at the very start. Ensure the pin is straight and the box isn't cracked. Sometimes, the slider itself is too loose or worn, allowing the teeth to separate under tension. Try a new slider if the bottom components appear fine.
Q: Can I use super glue to fix a broken zipper stop?
A: It's generally not recommended. Super glue can create a rigid, brittle bond that may break again quickly under stress, and it can also glue the zipper teeth or tape together, permanently damaging the zipper. It's better to use a replacement stop or sew a fabric stopper.
Q: My zipper is stuck and won't move. What should I do?
A: First, check for any fabric or threads caught in the teeth and gently work them free. If there's no snag, try applying a lubricant (zipper wax, graphite pencil, or candle wax) to the teeth around the stuck slider. Work the slider back and forth gently, a tiny bit at a time, to help distribute the lubricant and free it.
Empower Yourself: The Last Word on Zipper Repair
Dealing with a broken zipper can be incredibly annoying, but hopefully, this guide has shown you that it doesn't have to be a death sentence for your favorite jacket or bag. By taking a methodical approach, understanding the simple mechanics, and having the right (and often common) tools at hand, you can tackle most separating zipper issues yourself.
This isn't just about saving money on a repair or avoiding buying a new item; it's about gaining a practical skill and feeling empowered to mend the things you own. So, the next time a zipper fails you, don't despair. Grab your pliers, follow these steps, and bring your beloved garment back to life. You've got this!